Showing posts with label Recipes. Show all posts

Sunday, February 5, 2012

Involtini Recipe

When Jessie and I tried Peel Wood Fire Pizza on our staycation in September (see blog post here) we fell in love with their spinach artichoke involtini appetizer.  It was yummy pizza dough wrapped around a spinach artichoke dip.  Delicious!  I wanted to recreate it for a Holiday party appetizer and I couldn't find a single recipe online!  I did some further research on "Involtini" and found out that in Italy, Involtini is a type of dish where you wrap a food layer (typically meat) around a filling and then cook/bake it.  Sounds simple enough to me!  I grabbed a tube of my newest obsession, Pillsbury Thin Crust Pizza Dough (which I now always keep in my fridge for a last minute pizza dinner) and whipped up a traditional spinach artichoke dip.  Unfortunately I am marrying into a family of picky eaters (we're talking meat and cheese only) so I also made an alternate involtini with pepperoni and shredded mozzarella cheese.


Involtini out of the oven
First you roll the pizza dough out on a pan and then spread the filling over the entire piece of dough (spinach artichoke dip or pepperoni and cheese).  I didn't heavily fill the edges of the dough because I didn't want to have trouble rolling the dough and having it ooze out all over me.  After the filling is spread out, roll the dough longways into a spiral.  I usually bunch the ends to completely enclose the filling inside the dough.  I then brushed the top with olive oil mixed with Italian seasoning and sprinkled Parmesan cheese on the top (this turns out great once baked!)  Throw it in the oven at 400 degrees for only 10 minutes (or until it turns golden brown).


Pepperoni and Mozzarella Involtini slice
Once baked, I let it cool a big before cutting it into bite sizes slices.  I reheated when I served it later at Ryan's aunt house, and added marinara sauce and a Parmesan cream sauce for dipping.  They were gone instantly!  Super easy, Super Italian, and Super Good!

Last weekend I also tried a similar quick appetizer when I tore up pieces of pizza dough and made individual stuffed dough balls with pepperoni and cheese.  Those went fast too ;-)

Tuesday, January 17, 2012

Recipe: Pesto Spread

Here is a fun dip/spread that Jessie whipped up for an ugly sweater Christmas party last month.  It was super easy to make and its pretty green color really makes it really stand out.  Serve with a sliced, crispy, french baguette and enjoy!


Pesto Spread
Ingredients:
  • 8 ounces of parmesan cheese in 1 inch chunks
  • 8 ounces of asiago cheese in 1 inch chunks
  • 1 tablespoon of chopped garlic
  • 1 teaspoon ground pepper
  • 2 tablespoons chopped basil
  • 2 tablespoons chopped scallions
  • 1 teaspoon red pepper flakes
  • 1 1/2 cups Extra Virgin Olive Oil
Directions:
  • Mix all ingredients all together in food processor and VOILA!  Ready to serve!

told you it was easy ;-)

Tuesday, January 10, 2012

Mac N' Cheese with Pancetta

Jessie and I love Mac N' Cheese.  We are not Mac N' Cheese snobs, Kraft Mac N' Cheese is right there on the top of our list;  however, there is something special about Mac N' Cheese made from scratch.  Add pancetta to it and you've just stepped it up a notch!

Here is the homemade Mac N' Cheese with Pancetta Jessie and I made for a holiday party this month. 


MAC N' CHEESE WITH PANCETTA
Ingredients:
- 4 tablespoons (1/2 stick) butter, divided
- 4 ounces thinly sliced pancetta
- 1 finely chopped medium yellow onion
- 3/4 teaspoon dried crushed red pepper flakes
- 1 (2) garlic clove, minced
- 1/4 cup all purpose flour
- 3 1/2 cups whole milk
- 2 1/2 cups shredded sharp cheddar cheese
- 1 cup grated Parmesan cheese
- 1 8 ounce container mascarpone cheese
- 1 1/2 cup italian panko bread crumbs
- 1/2 cup chopped fresh parsley
- 1 pound cooked macaroni noodles

Directions:
1. Melt 1 tablespoon butter in large deep skillet over medium-high heat. 
2. Add pancetta; saute until crisp, about 6 minutes. 
3. Add onion; saute until tender, about 5 minutes. 
4. Add crushed red pepper and garlic; stir 1 minute. 
5. Stir in 3 tablespoons butter; allow to melt, then add flour and stir 1 minute. 
6. Gradually whisk in 3 1/2 cups milk; simmer until thick enough to coat spoon thickly, stirring frequently, about 5 minutes.  Remove from heat. 
7. Whisk in cheeses. 
8. Whisk in more milk by 1/4 cupfuls until sauce is thick but pourable. 
9. Season with salt and pepper. 
10. Preheat oven to 350
11. Mix cheese sauce with cooked pasta in pasta pot; transfer mixture to prepared baking dish
12. Sprinkle bread crumbs evenly over
13. Bake Mac N' Cheese about 30 minutes (until golden brown on top)
14. Garnish with parsley

It really helped having the two of us cooking because one person has to constantly stir while the other is free to prepare the other ingredients.  It turned out awesome!  And the leftovers were just as good!

Friday, December 30, 2011

Spinach balls

Want to know a way to trick your kids early on to love spinach?  This recipe for spinach balls is the way my mom did it for my sister and me.  Granted there is butter and cheese involved, which doesn't hurt, but the fact that we got to squish all the ingredients with our hands made it really fun for us!


SPINACH BALLS
Ingredients:
- 2 10 oz. packages of frozen chopped spinach (thawed and drained)
- 2 cups pepperidge farms dried stuffing
- 1 cup grated Parmesan cheese
- 1/2 cup melted butter
- 4 eggs
- salt and pepper for taste

Directions:
1. Preheat oven to 350
2. Mix ingredients in bowl until complete mixed together
3. Roll mixture into 1-inch balls and placed on baking sheet (put tin foil on baking sheet to avoid clean up)
4. Bake spinach balls for 12-15 minutes

Wednesday, October 5, 2011

Recipe: Ricotta Gnocchi with Bolognese Ragu

The other day I made homemade ricotta Gnocchi.  The recipe provides a simple melted butter sauce to pour over the gnocchi, but I was craving a meaty ragu sauce, so I created a great bolognese recipe to top the gnocchi.  It came out delicious!  I found the gnocchi recipe at Epicurious.com and kind of just pieced together the ragu recipe myself.

Ingredients for Ricotta Gnocchi:
  • 2 cups whole-milk ricotta (1 pound)
  • 2 large eggs, lightly beaten
  • 1 cup grated Parmigiano-Reggiano (3 ounces), divided
  • 1/4 teaspoon grated nutmeg
  • 1 1/4 cups all-purpose flour
 Directions for Ricotta Gnocchi:

1.   Stir together ricotta, eggs, cheese, nutmeg, and 1/4 teaspoon each of salt and pepper. Add flour, stirring to form a soft, wet dough.

2.  Shape dough on a well-floured surface with lightly floured hands into 1-inch-thick ropes. Cut crosswise into 1-inch pieces with a lightly floured knife. Put in 1 layer on a lightly floured parchment-lined baking sheet.

3.  Cook gnocchi in 2 batches in a pasta pot of boiling salted water (3 tablespoons salt for 6 quarts water), adding a few at a time to pot and stirring occasionally, until cooked through (cut one in half to check), 3 to 4 minutes per batch. Lift out with a slotted spoon and drain in colander. 

Ropes of dough before cutting up into gnocchi pieces

Ingedients for Bolognese Ragu:
  • 1 tablespoon EVOO
  • 3 tablespoons butter
  • 1 carrot, finely, diced
  • 1 medium onion, diced
  • 1 rib celery, finely diced
  • 1 teaspoon of minced garlic
  • 1 pound bolognese sausage
  • 1/4 pound pancetta, diced
  • 1 can tomato paste 
  • 1/2 teaspoon sugar, granulated
  • 1 cup milk
  • 1 cup dry white wine
  • Salt and pepper
  • Fresh basil leaves
  • Parmesan, for garnishing
Directions for Bolognese Ragu:

1.  Cut open casing of Bolognese sausage links and break up meat into ground pieces
2.  In a saucepan, heat the olive oil and butter over medium heat. Add the onions, celery, carrots, and garlic and heat over medium heat until the vegetables are translucent and soft but not browned, about 10 to 15 minutes.
3.  Add bolognese sausage and diced pancetta and stir into vegetables.
4.  Add the tomato paste, sugar, milk, and wine and simmer over medium-low heat for 1 to 1 1/2 hours.
5.  Season with salt and pepper, to taste, and remove from the heat.
6.  Top gnocchi with sauce and garnish with fresh parmesan cheese and fresh basil leaves.
7.  MANGIA BENE!!!
Ragu Simmering

Ricotta Gnocchi topped with Bolognese Ragu
The Gnocchi was really rich, so I would recommend only putting a small amount per plate (thing of how many large ravioli you would eat at a restaurant).  I put about 7 on my plate and I was stuffed.  I got the pancetta and the bolognese sausage links from Salume Beddu, a butcher shop in South City, right off Hampton Road.  Salume Beddu was really cool, and in addition to their butcher shop, they also serve sandwiches containing the meat they cut.  There are tables to dine in, or you can take them to go.  I definitely want to go back on a Saturday and grab a sandwich or panini.  They looked really good.

Salume Beddu Butcher Shop

Thursday, September 1, 2011

Monkey Bread Muffins Recipe

So as some of you know, I am not a big dessert person, but I do have a particular sweet tooth for cinnamon sugar!  (I will out eat anyone in a cinnamon roll eating contest).  So of course I go absolutely bananas for MONKEY BREAD!!!  I found a recipe that makes individual servings of monkey bread by serving it as muffins.  Genius!  I decided to try it out and they were so good!  Here is the recipe I used:

Monkey Bread Muffins (yields 12 muffins)

Ingredients:
1-1/2 sticks unsalted butter, chilled
3 tbsp maple syrup
1/3 cup + 2 tbsp granulated sugar
1/3 cup brown sugar
1 tbsp ground cinnamon
2 cups flour
1 tbsp baking powder
1/2 tsp salt
3/4 cup buttermilk

1 cup confectioners sugar
2 tbsp milk


Directions:
- Preheat oven to 425 degrees. Line 1 muffin tin with 12 liners


Maple Butter:
In a small bowl, microwave 4 tbsp butter and the maple syrup at high power until melted, about 30 seconds

Cinnamon Sugar coating:
- In a small bowl, mix together 1/3 cup granulated sugar, brown sugar, and cinnamon


Dough:
- In a food processor, combine the flour, baking powder, the remaining 2 tbsp of granulated sugar, and salt. Pulse until well combined. Cut the remaining butter into small pieces and pulse together until the mixture resembles bread crumbs.
- Pulse in the buttermilk until the dough comes together.


Glaze:
Mix together confectioners sugar and milk to make the glaze.

Create the Muffins:
-Transfer to a floured work surface, and pat dough into a 10" square. Use a pizza cutter or sharp knife to quarter the dough, then cut each quarter into 16 equal pieces. Roll into balls
- Dip each ball in the maple butter, then the cinnamon sugar coating. Place 4-5 coated balls into each muffin cup press down gently.
- Tent the muffin tin with tin foil and bake until cooked through and golden, about 15-17 minutes.
-  While the muffins are still warm, drizzle the glaze over the muffins. Serve warm.


They are delicious!


Square of dough before separating into balls

balls of monkey bread in muffin pans before baking

Finished Result!


Monday, August 29, 2011

Turkey Burgers!

The big wedding day is less than 2 months away, time for a crash diet, right? HA! Although no crash dieting for me I am trying to avoid red meat a little more than usual so I decided to try a turkey burger for dinner. Every recipe I looked up varied so much so I decided that I would just wing it with what I thought would taste good. Here is what I came up with:

Turkey Burgers (serves 4)
  • 1 pound Ground Turkey Meat (I like the when it says "lean" on there, you know, crash diet and all)
  • 3/4 cup Italian Bread Crumbs
  • 1/2 cup grated Parmesan Cheese
  • 1 Egg
  • 6 Basil Leaves, cut into tiny pieces
  • 3 big fork fulls of Sun-dried Tomatoes, cut into tiny pieces
  • 1 tablespoon EVOO (or I used the olive oil that the Sun-dried Tomatoes were in)
  • Salt and Pepper (to taste, I messed up and forgot to add salt and it definitely needed at least a teaspoon of salt)
  • English Muffins, sliced in half
  • Burger toppings of your choice (We used left over fresh mozzarella pieces and sliced tomatoes)
Put all ingredients, except English Muffins and burger toppings, in a large bowl.
Everything added pre-mixing.
Mix all ingredients with your hands (after they were washed of course). Do not over mix as this will cause the meat to be tough. If the mixture feels wet add more parmesan and bread crumbs. It if feels dry add more EVOO. With your hand score the meat mixture into 4 even sections (Rachel Ray tip that works).
4 burgers all measured out.
Grab 1/4 of the mixture and form into a burger about 1/2 inch thick. Be sure to make the outside edges thicker than the inside section of the burger. When you grill the burger it shrinks up and this will keep your burger from having that big bump in the middle of it. Repeat with other 3 sections.
Notice how the insides are pushed in more.
Have your grill pre-heated to about 400-425 degrees. Place all of the burgers on the grill and close the lid. Let cook for 5-6 minutes. Flip all the burgers and close the lid again. Let cook another 5-6 minutes. Remove the burgers from the grill. Put the english muffins on the grill, cut side down, and toast quickly while the burgers cool slightly. Now make your burger and add any toppings you like...I highly recommend buffalo mozzarella and fresh tomato slices.
Completed yummy burger!
The great thing about this recipe is you can basically add ANYTHING you want to the burger mixture. Any fresh herb, finely diced bell peppers, or different cheese (I hear feta is great with a turkey burger). Experiment and have fun! Just think, these are actually WAY healthier than a normal burger!

A direct quote from Joe, an avid red meat burger lover, "Those are f'ing good!" I think that says it all about the turkey burgers.

Thursday, August 25, 2011

Bachelorette Week: Jungle Juice

Continuing Bachelorette Party week...

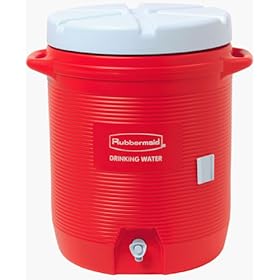
Also on the party bus, I had a cooler full of jungle juice, yet nobody drank it because we had so many jello shots and beer.  However, Jungle Juice really takes me back to my college days and the turtle creek parties that the boys used to throw.  We would always drink the juice very cautiously because we knew that despite its pure Kool Aid taste, that thing was loaded!  Below is the recipe I used:

Ingredients:   
 
     Alcohol
          2 Liters (approx 1/2 gallon) of Everclear
     Mixers
          1 Gallon of Orange Juice (no pulp)
          4 Liters (approx. 1 gallon) of Sprite
          2 Quarts (1/2 gallon) of Cranberry Juice
          2 Quarts (1/2 gallon) of Ice Tea (sweet, preferably flavored)
          1 Gallon of red Hawaiian Punch or Kool Aid
     Fruit
          4 Oranges
          4 Apples
          2 Limes

Directions:    

     1. Pour all the Everclear into your cooler
     2. Add all the mixers and stir while adding them
     3. Perform a taste test and add more liquor or juice as desired
     4. Cut the fruit into bite sized pieces and add them into the mix
     5. Viola! You’ve got jungle juice!

Definitely not drinking water...

Tuesday, August 23, 2011

Bachelorette Party: Dinner at SALT

Continuing on with Bachelorette Party week... this post focuses on our private dinner at SALT, in Central West End. 

Chef Wes Johnson (previously at The Shaved Duck and Eclipse) opened SALT this past May, and Jessie, the Viz girls and I had a chance to go opening week.  SALT has a very unique atmosphere and is in an old white mansion that used to be a funeral home.  After our May dinner, we got a private tour of the 2nd floor "Egyptian Room" and the private wine cellar in the basement.  Once I saw the wine cellar, I knew it would be the perfect setting for a bachelorette dinner to start the festivities of the bachelorette party night ("classy to trashy!" lol!).  That next weekend, I started emailing with Melody, SALT's event coordinator, and the rest is history!

Below is the custom made menu that I helped put together for the event:

Small Plates (Family Style):

Duck Fat Frites
with house made ketchup and garlic aioli


Mac n' Cheese

Scallop wrapped bacon
Pork and fennel meatballs in blackberry jam
Pear salad with smoked jowl, blueberries, mint in pork fat chili vinaigrette

Choice of Entrees:

Seared Trout (not pictured)
with potato, corn, pea hash, local greens, lemon vinaigrette

Pork Steak (not pictures)
with apple sauce risotto, guancale lardon

Overall, SALT's charm is in its small plates.  I suggest getting a bunch to share with the table.  Our top picks are their duck fat fries (unbelievable homemade dipping condiments!) and Chef Wes Johnson's trademark meatballs in blackberry jam.  We were also pleasantly surprised with the pear salad with the bits of smoke jowl (think pieces of chewy bacon).  And the chef made us our own version of Mac N' Cheese which was soooo good and has a wonderfully toasted bread crumb crust (unfortunately this is not a regular menu item, but it should be!).

Next on Bachelorette Party week... we go from CLASSY to TRASHY!!!  WOOT!!!

Monday, August 22, 2011

Bachelorette Party: Jello Shots

Welcome to Bachelorette Party Week on J + J Twins - Mangia Bene blog!!!

This past Saturday was Jessie's Bachelorette party and it was full of great drinks and food!

Today's post features the Jello Shot Syringes that Jessie and I made the night before.

RECIPE:
  • 6 oz box of jello (either 1 big box, or 2 of the smaller boxes)
  • 2 cups boiling water
  • 2 cups cold vodka
  • Jello shot cups or syringes
  1. put Jello powder in large bowl
  2. boil 2 cups of water.
  3. Pour the boiling water into the bowl containing the Jello
  4. Stir until all of the clumps of powder are dissolved
  5. Let sit until cools down to room temperature
  6. Pour 2 cups of chilled vodka and stir
  7. Pour/suck up contents into Jello shot container
  8. Keep Jello shots in fridge to solidify
It's that easy!  And using the Jello shot syringes make it really fun and easy to eat, especially on a party bus!

See pics below:


I over shopped on the Jello
we only used about 1/5 of this

4 flavors cooling in their bowls: Strawberry, Berry Blue, Grape and Orange

Sucking up the Strawberry into the syringe

166 jello shots cooling in the fridge

Monday, August 15, 2011

Mom's Pasta Salad

If someone asked Josie and me what one dish we think of when we think of summer I know that both of us would 100% answer our mom's pasta salad. Our mom made this pasta salad all summer long whether it was for a pool party we were hosting or for a BBQ we were attending. I may be biased but I think this is the best pasta salad in the world.

Mom's Pasta Salad Serves a large crowd!

  • 1.5-2 boxes of Tri-Color Rotini (I use Barilla, has never failed me), cooked, drained, rinsed with cold water. DO NOT OVERCOOK or you will get mushy pasta salad and no one wants that.
  • 1 packaged sliced Pepperoni, slice in half
  • 1/2 of a large red onion, diced into tiny pieces
  • 1 jar of Artichoke Hearts, chopped (I usually buy the jar where the artichokes are soaked in olive oil and Italian seasoning)
  • 1 pint of Cherry or Grape Tomatoes, halved or quartered depending on preference
  • 1 small can of sliced Black Olives
  • 1/2 cup freshly grated Parmesan Cheese 
  • 1 small jar of diced Pimentos (you will only use about 1-2 tablespoons of these)
  • 1 bottle of semi-homemade Italian Dressing (We ALWAYS use the Good Seasons dry Italian dressing mix. You can buy 2 packages of the mix and it comes with the dressing container. I swear it is delicious.)
All of the ingredients.
The hardest part of this pasta salad, and it really isn't very hard, is just preparing all of the ingredients. Get the pasta cooked and cooled. Chop the onion, slice the pepperoni, slice the tomatoes, chop the artichoke hearts....you're done! Place the pasta in a very large bowl and prepare to add all of the ingredients.

Everything all prepared and ready to be mixed.
I usually wait to mix everything until 30 minutes-1 hour before I am going to serve it. I like to add everything but the dressing and cheese to the pasta and mix. Then I add the bottle of dressing and the cheese and mix again. A full bottle will work for 1.5-2 boxes, use less for 1 box of pasta. 
The pasta salad half eaten, I forgot to take a photo 'till after people ate, oh well!
The great part about this pasta salad is that it tastes amazing as left-overs! Joe and I ate some for dinner the night after (and a few noodles for breakfast, shhhhh). If you invite me over, can I please bring the pasta salad?

Wednesday, August 10, 2011

Summer Veggie Tian with Lemon Pepper Tilapia

The other night Josie came over for dinner and we were both really craving veggies and fish. If you have the same craving I would highly recommend the meal we made. We slightly adapted the recipe from Saveur Magazine.

Summer Vegetable Tian - Serves 6 as a Side Dish (great as leftovers)

  • 1 medium eggplant, peeled
  • Salt
  • 1 medium yellow onion, peeled and chopped
  • 3 cloves of garlic, peeled and minced
  • 5 tablespoons Extra Virgin Olive Oil
  • Pepper
  • 2-3 medium zucchini, sliced diagonally (to make larger)
  • 4 ripe farm grown tomatoes, sliced
  • 2 teaspoons Italian Seasoning
  • 1 ball fresh mozzarella, sliced into as many thin pieces as possible
  • Baking Dish
  • PAM
  • Have Oven Preheated to 400 degrees.
Cut the eggplant into 1/2 inch cubes then place in a colander in the sink. Generously sprinkle salt all over the eggplant and let sit for at least 15 minutes to drain the bitterness out of the eggplant.

Cook the onions in 3 tablespoons of EVOO in a skillet over medium heat for about 8 minutes. Then add garlic, salt and pepper to the onions and cook for at least 2 minutes, until you start smelling garlic and before the garlic turns brown. Spray your baking dish with PAM and add the onion/garlic mixture to the dish.
Onions and garlic cooking away!
To the same skillet add 1-2 tablespoons of EVOO and keep over medium heat. Squeeze your drained eggplant to get excess liquid out of the eggplant. Add the drained eggplant to the skillet and saute for about 8 minutes, until soft, season with salt and pepper. Add the cooked eggplant to the onion/garlic mixture in the baking dish and stir to combine.
Eggplant added to the onion/garlic mixture in the baking dish.
Arrange the zucchini and tomato slices in overlapping layers in the baking dish over the eggplant/onions/garlic. Top with 1-2 tablespoons EVOO, Italian Seasoning, and Salt and Pepper.
All the veggies layered up. Josie did a fabulous job with this!
Bake the dish (400 degrees) for 20 minutes. Remove from oven and add the fresh mozzarella slices on top of the veggies. Put the dish back in the oven for an additional 20-25 minutes. Let cool before serving.
Everything tastes better with CHEESE, our finished veggie tian.
With the veggies we decided to serve a very easy to prepare fish, tilapia. We thought that lemon pepper would be a nice flavor next to the veggies. Be prepared for the easiest fish recipe ever.

Lemon-Pepper Tilapia - Serves 3 (me/Joe/Josie)
  • Baking Sheet
  • Aluminum Foil
  • 3 fresh tilapia fillets (less than $7 for all 3 at Schnucks that night)
  • 3 teaspoons EVOO
  • 1 tablespoon (more or less) of Lemon Pepper Seasoning (I buy it in the shaker of the seasonings, very easy to shake on)
  • Have oven preheated to 400 degrees (already done with the veggies)
Lay a large piece of aluminum foil on the baking sheet, this means NO CLEAN UP, so I would highly recommend this step. Place the 3 tilapia fillets on the foil. Add 1 teaspoon of EVOO to each fillet. Rub the EVOO over the top and bottom of each piece of fish. Shake the seasoning in an even light layer over the top and bottom of each piece of fish. Place the baking sheet into the oven and leave it there for 15-20 minutes, I find that 17 minutes is basically perfect. The fish is ready to serve nearly immediately.
Our yummy dinner. We didn't even miss a large carb side, we all were very full after this meal!
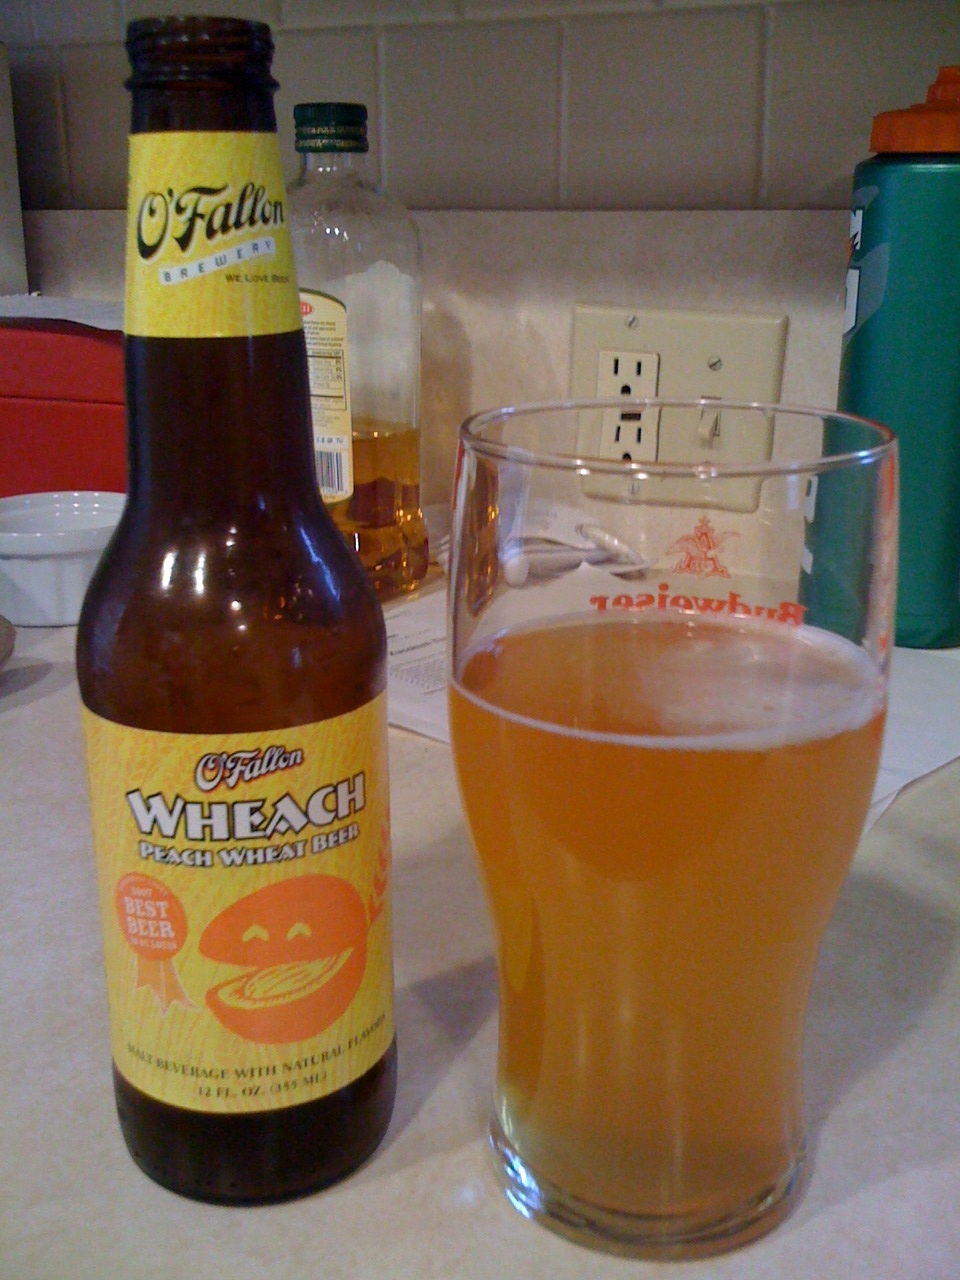
This was a great, fresh, summer meal. Of course we needed a tasty beverage with our meal and one of our favorite summer beers is the O'Fallon Wheach beer. It is a wheat beer with peach flavor from O'Fallon, MO and hit the spot!
The best local summer beer!!

Wednesday, August 3, 2011

Joe's Stone Crab: Key Lime Pie Recipe


Joe's Stone Crab is a famous seafood restaurant in Miami Beach, Florida.  My dad has been several times, always knowing how to beat the crowds and get the hard to come by reservations there.  So of course one of the most popular South Florida restaurants is going to make a wicked Key Lime Pie.  Below is the recipe for Joe's Stone Crab Key Lime Pie. 


Ingredients:

For the Filling:
  • 5 egg yolks
  • 2 can(s) (14-ounce) sweetened condensed milk
  • 1 cup(s) fresh lime juice
  • Zest of 1/2 lime
For the Graham Cracker Crust:
  • 10 graham crackers, crushed
  • 1/4 cup(s) sugar
  • 5 tablespoon(s) melted butter
  • Whipped cream, optional

Directions:
  1. For the filling: Mix yolks, milk, juice, and zest.
  2. For the crust: Mix crackers, sugar, and butter. Form the crust in a 12" pie pan. Bake 8 minutes at 375 degrees F. Remove and let cool.
  3. Pour in the filling and bake another 8 minutes at 375 degrees F. Remove and let cool. Once cool, place in the freezer until ready to use.
  4. Before serving, remove from the freezer and let thaw at room temperature for 15 minutes. Top with whipped cream if desired.
For more of Joe's Stone Crab's recipes, such as ginger salmon or crab cakes, click here

Monday, August 1, 2011

LoRusso's 2011 Pasta Bowl Winning Recipe


Each Monday after the Super Bowl, LoRusso's Cucina on Watson Road holds the annual Pasta Bowl competition where people come to sample three recipe entries and vote on the winning dish.  All of the proceeds go to Operation Food Search and the winning recipe is featured on the menu for the entire year, with $2 being donated each time the dish is ordered.


This past February, my recipe won the 2011 Pasta Bowl and is currently featured on the menu.  The dish is Bucatini (a long thick spaghetti-like noodle with a hollow center) with a light pesto sauce, sun dried tomatoes, shrimp, pancetta and pine nuts.

Bucatini Noodles

It was a really close competition (I only won by 5 votes) and it was a really fun event to come and try all of the pasta dishes.  Below is my winning recipe:

“Bucatini a la Pesto with Shrimp and Pancetta”
Serves 6 as an entrée

Ingredients:
1 lb. Bucatini Pasta
1 lb. 20 Count Deveined, Peeled, Uncooked Shrimp
½ 1b. Pancetta, sliced ¼ inch thick
6 ounces of finely diced Sun-dried Tomatoes
1 tsp (or more to taste) Crushed Red Pepper Flakes
2-3 Large Garlic Cloves (pressed or finely minced)
¼ cup Pine Nuts
½ cup of finely grated Fresh Parmesan Cheese
¼ cup plus more for garnish largely grated Parmesan Cheese
½ cup Pesto Sauce (chopped basil, parmesan cheese, olive oil, chopped pine nuts)
Salt and Pepper
Extra Virgin Olive Oil (EVOO)

Directions:
1. Put a large pot of cold water over high heat, salt water liberally and cover pot with lid; Once water comes to a boil, put in Bucatini Pasta and cook for 9 minutes until Al Dente; drain pasta but save 1 cup of residue pasta water from the pot.
2. Dice Pancetta into about 1 inch slices; Place a separate large, high sided skillet over medium heat; Brown the pancetta until it is just about to turn brown (want it with a slight crisp, but not too crispy); Remove pancetta from the pan and place on paper towels; Discard the fat from pan and wipe down.
3. Season shrimp with salt and pepper; Put 1 tablespoon EVOO in high sided skillet and heat to medium heat. Sauté garlic and shrimp in skillet for about 4 minutes until shrimp turns pink.
4. In separate small pan, toast pine nuts over medium-low heat for a few minutes.
5. In a small bowl, mix pesto sauce with finely diced sun-dried tomatoes and with finely grated fresh parmesan cheese; add EVOO (or the olive oil from the jar of the sun-dried tomatoes if you used a jar) to the mixture until it gets a good texture
6. In a large bowl or pot, mix Bucatini Pasta, Residue Pasta Water, Pine Nuts, Crushed Red Pepper Flakes, Shrimp with Garlic, Pancetta, and Pesto/Sun-dried Tomato Sauce Mixture
7. Plate pasta. Garnish with large grated Fresh Parmesan Cheese.
8. MANGIA BENE!!!


Josie and Josie with the winning dish!
If you haven't been to LoRusso's, I definitely recommend it.  My family has been eating there for years and recently we threw Jessie and Joe's engagement party there in the banquet room they have for big parties.  LoRusso's also catered our college graduation party a few years ago where we had a big salad and pasta buffet for our guests.  The food is great and the atmosphere is definitely old school Italian (they even have a piano player Thursday, Friday and Saturday nights).  The chef, Rich LoRusso and his wife Terri run the place and are there everyday (except closed on Mondays).  I definitely recommend that you try my pasta bowl dish and absolutely do not forget to order the flash fried spinach for an appetizer!!!!!!

Josie with Chef Rich LoRusso and his wife Terri
Note: our cousin Mary Ann won the 2010 Pasta Bowl with her yummy eggplant pasta dish and Jessie won the 2009 Pasta Bowl with her penne with sausage and tomatoes.  We've definitely kept it in the family!  Keep an eye out for future posts providing you with their winning recipes!

Patane Pasta Bowl Winners: Mary Ann, Josie and Jessie

Tuesday, July 26, 2011

Watermelon - The New Black

Everywhere I'm looking (online, magazines, grocery stores) I am seeing watermelon recipes! So I just had to jump on the trend bandwagon and try a new watermelon recipe myself. I tried this drink two ways and to me there is a very clear winner, let me know if you agree!

Watermelon - Strawberry -Vodka - Summer Cooler (Serves 2)

  • 4 cups seedless watermelon, cut into manageable chunks
  • 1 cup hulled strawberries (aka green parts cut off) and cut in half
  • food processor (or blender, mine is sadly dead)
  • fine mesh strainer
  • large bowl
  • 2 shots of vodka (jalapeno vodka if you use Attempt #1)
  • Lots O Ice
  • 2 tall glasses
  • straws optional but recommended
Throw the watermelon and strawberries into the food processor. 
Turn it on and let it crank for at least 2 minutes to make sure everything gets broken up well. Pour the mixture through the fine mesh strainer that is located over the large bowl. You want to make sure none of the seeds get through to your end product, the cocktail! 

Attempt #1: Fill your 2 tall glasses with lots of ice. Put 1 shot of jalapeno vodka into each glass. Pour the watermelon/strawberry strained mixture over the ice (should split pretty evenly between the two glasses). Get out a big spoon and stir to combine. Enjoy and hopefully your lips do not burn off of your face!
We used our Pat O'Brien's glasses from New Orleans!
Attempt #2: Fill your 2 tall glasses with lots of ice. Put 1 shot of regular vodka into each glass. Pour the watermelon/strawberry strained mixture over the ice (should split pretty evenly between the two glasses). Get out 2 plastic straws and stir to combine. Enjoy and you will not have your lips burn off.
The WINNING attempt!

Joe and I tried #1 and although the drink tasted very refreshing at first, the after effects were too much to handle. So Josie and I tried #2 and thought this drink was super cool, refreshing, and most of all trendy. Let  me know if you want to have any jalapeno vodka because I don't think we will be running out anytime soon!!

Monday, July 25, 2011

Chicken Cordon Bleu Dinner - J+J Style

Josie and I wanted to put an Italian spin on a traditional dinner. We made a creamy, lemony orzotto topped with sliced chicken cordon bleu with prosciutto, provolone and basil with a side of sauteed zucchini.

CHICKEN CORDON BLEU
We decided to jazz up chicken cordon bleu with the help of Rachel Ray's original recipe found here. Below you can see the recipe we came up with.
  • 4 boneless, skinless chicken breasts - butterflied then pounded to 1/4 in. thickness
  • 6 pieces thinly sliced prosciutto (This only cost us a total of $1.17 at the Schnucks deli. This goes to show you that you can use a costly product if used in small quantities.)
  • 4 pieces provolone cheese
  • 4 basil leaves - sliced into small pieces
  • Kitchen twine
  • 1 tablespoon EVOO
Preheat the oven to 425 degrees.

Lay the pounded chicken breasts on a flat surface and place 1.5 pieces of prosciutto on top, then a slice of provolone, then 1/4 of the cut basil on top of that.


Roll the chicken tightly lengthwise. Secure with 3 pieces of kitchen twine (1 at the top, 1 at the bottom, 1 in the middle) that you double knot then cut off the excess twine. 


Put a large saute pan over high heat and add the EVOO. Place the chicken in the pan with the seam side down. Sear on all 4 sides (approximately 1.5 minutes per side) so that there is no pink visible on the outside of the rolls. Move the seared chicken to a baking dish sprayed with PAM. Place in the oven and cook for 15 minutes. Let cool for at least 2 minutes after removing from the oven. Remove the kitchen twine. Slice the chicken at a diagonal.

LEMON-BASIL ORZOTTO
We love orzo and we love risotto...combining the two sounded AMAZING so we had to try this recipe from Kelsey Nixon. We made a few edits and you can see how we made our recipe down below.


  • 2 tablespoons EVOO
  • 1 shallot, chopped
  • 1 cup orzo pasta
  • 1/2 cup chardonnay 
  • 2 cups chicken stock
  • 1/3 cup grated Parmesan cheese
  • 5 basil leaves cut into thin slices
  • 1 teaspoon lemon zest
  • 1/4 cup whole milk
  • 1 large lemon, juiced
  • salt and pepper
In a medium sauce pan add the EVOO and shallots. Saute over medium heat for 2-3 minutes until fragrant and soft. Add the orzo and toast for 2 minutes while stirring. Add the wine and cook until absorbed.

Gradually add the chicken stock and bring to a simmer. Cover and turn the heat to low. Let cook for 10 minutes then remove the lid and let cook for 5 more minutes. By this point the majority of the liquid should be gone.

Stir in the Parmesan, basil, lemon zest, whole milk and lemon juice. Season with salt and pepper. Heat on low for an additional 2-5 minutes for flavors to combine and more liquid to be absorbed. Serve immediately.

SAUTEED ZUCCHINI
This is a staple side dish we ate growing up and we continue to make now. Super easy and super tasty!

  • 2 green zucchini
  • 1 tablespoon EVOO
  • salt and pepper
  • 1/4 cup grated Parmesan
Slice the zucchini into 1/4 inch thick rounds then cut the rounds in half (half moons). Heat a large saute pan over medium-low heat, add the EVOO, sliced zucchini, and season with salt and pepper. Saute zucchini for 15-20 minutes, stirring every 2 or so minutes. After placing the warm zucchini on the dinner plate top with grated Parmesan cheese. Beware, these zucchini will go fast, so yummy!

Here is how our dinner plate looked...


Mangia bene!!

Friday, July 22, 2011

Avocado Ice Cream

Disclaimer: I did not find this recipe delicious but maybe you will. I still had to share!!!!

After watching the first season of Top Chef: Masters I became a huge fan of Rick Bayless, the chef mostly known for his Frontera Grill in Chicago. When Josie sent me Rick's recipe for avocado ice cream I knew I had to try it. You can find the link to the recipe here and below is the recipe with a few tweeks I made.
  • 1.5 cups avocado puree (Peel and pit 3 ripe medium avocados and process in the food processor until smooth.)
  • 1.5 cups water
  • 1 and 1/3 cups sugar
  • 1/4 cup freshly squeezed lime juice
  • 1/3 cup tequila
In a small sauce pan heat all the water and sugar together until sugar is dissolved.

To the avocado puree in the food processor, add the water/sugar mix, lime juice and tequila. Pulse until well combined. Pour into a bowl and cover tightly with saran wrap (like put the saran wrap directly on top of the mixture to keep out any air. Pop in the refrigerator for at least an hour. After you puree your mixture should look like this:


Remove the mixture from the refigerator and pour into a prepared ice cream maker. It should stay in there for approximately 15-20 minutes until it firms up a bit.

Once it starts to look like ice cream (you will see the texture change from liquid to a bit more crystal like) move the ice cream into an airtight container. Once again cover with saran wrap. Pop it into the freezer to continue to harden up.

Serve the ice cream in small servings as the tequila gives it a rather strong flavor. Joe and I ate it after we had enchiladas. Josie and I had it after we had Italian sausage. Somehow no matter what you eat before will really prepare you for this unique taste. I have to say that Joe, Josie and I were not fans of this ice cream, possibly because of the strong tequila taste or possibly because we just couldn't wrap our heads around eating cold avocado as a dessert. The lesson learned is you will never know how something tastes until you try it! I love trying new and crazy recipes for fun and to broaden my taste horizons. Hopefully you will step out on a limb and try this dish or something else crazy that you have been wanting to try but never had the courage to. If you end up loving avocado ice cream please let us know!!!